Sunday 1 November 2015

Reflections

Well... the big day has been and gone. It's all been a bit of a blur. Last Friday, the preparations were frantic, what with the dress still unfinished the day before the wedding (THANK YOU, mother-in-law!!!), the favours still not decorated, family and friends all wanting a piece of our attention and just general, last-minute panic. I admit my nerves were thin, worn and when the DVLA decided that that day was a good day to yet again annoy me with their inefficiency I broke down in tears.

By 8pm all was done and ready.

The favour idea got thrown out of the window and instead, I decorated the lot with piping icing in lots of different styles, from the abstract swirls of black with roses in the centre to cheesy phrases like 'love, love' love' and one or two that actually showed a picture of cheese with the caption 'some cheese'. Now I have approximately 80 pizza box holders here, ready to be crafted into something entirely different.

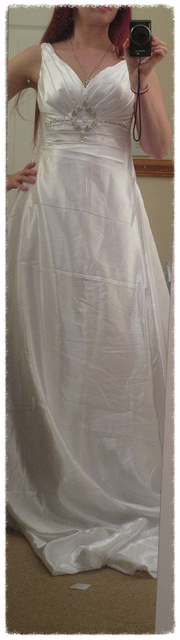
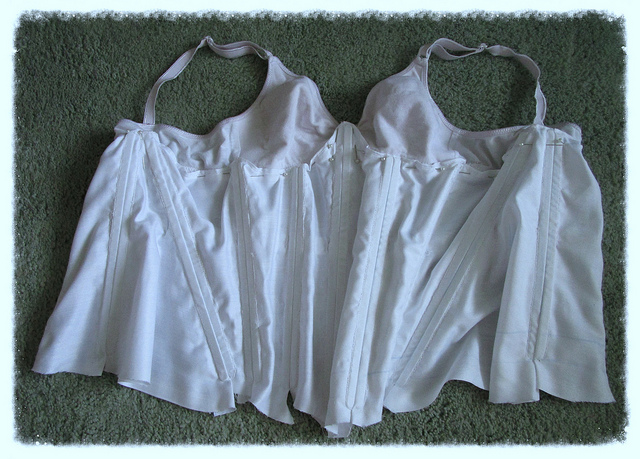
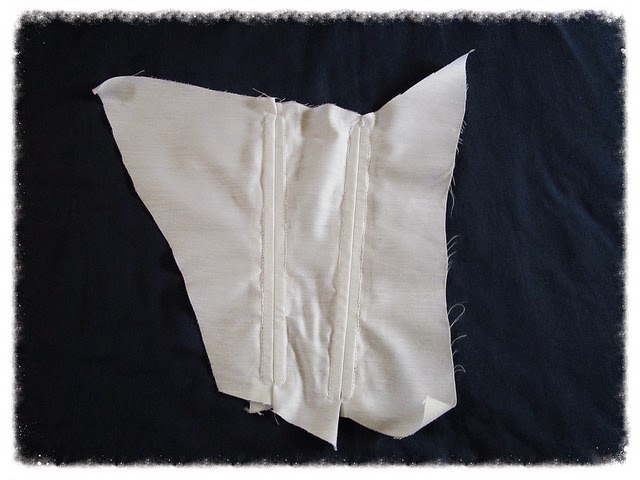
The dress has been finished with the help of my mother-in-law and it has been the first occasion I have ever heard that woman swear like a sailor. We went for the easy option in the end - loops made from ribbon, silver decorative ribbon to cover up minor faults at the back opening and a new modesty panel as the original one was nowhere to be found, and when I did, it was too short anyway.

The guest book got spiced up a bit with some card prompts I stole from the internet (questions like 'What are your 3 top tips for a happy married life' and 'What should we definitely do in our first year together?') and a variety of cheesy stickers, which, to my surprise, actually worked very well. Our guest book is about 2/3 full and most people have taken the time to fill in an entire page full of good advice and well-wishes.

It had been a lot more work than anticipated, but we got it all done in the end.

As you can see, I am now waiting for pictures. Our photographer has given us a glimpse only, with one beautifully captured picture of the cake cutting process, in which the Husband and I shared a moment of oblivious joy in the form of a broad grin on our faces.

What few pictures I have have been added here, but hopefully, over the coming days and weeks we will have a big selection.

I will keep this blog up and running, occasionally, with a few updates and possibly more ideas, should I have the opportunity to participate in other people's weddings in the future. There have been a few things I have probably missed, which I will also post when the time is right.

However, I will not give up crafting, and the wedding preparations have shown me just how much joy and, yes, relaxation I get from dabbling in various arts. I have just opened up another craft blog here, where I will post regularly on whatever it is I am making in our newly-wed household, from Christmas cards (upcoming!) to wall-art and the many cakes and bakes that make life just that little bit more interesting.

Please do visit my new blog, The Crafty Times, leave comments and enjoy.

Wednesday 21 October 2015

Favours

Sooo... the big day is nearly here, the dress is almost finished and the activity packs for the children are done.

Tine to turn to the favours. I have decided on simple ginger biscuits. The original idea was complicated and intricate, with pizza box holders acting as tiers between two biscuit bases to imitate a wedding cake.

The reality is simpler, because the biscuits wouldn't fit the bags I bought for them.

To make the biscuits, sieve 350g plain flour into a bowl, add 3 1/2 tsp baking powder and 1tsp bicarb, then mix with 180g brown sugar, some salt and about 1 1/2 tsp cinnamon.
In a pan, melt 125g butter and add 75g golden syrup. Leave the mixture to cool and them mix with the dry ingredients. Add 1tsp orange extract and 2-3 squeezes squeezy ginger, add 1 egg and knead with your fingers until thoroughly mixed. Add extra flour if necessary.

Form 30-40 small balls from the dough and press lightly onto grease-proof paper on a baking tray. Bake at 160 degrees C for 15-18min and then leave to cool on a rack before transferring to a tin.

I haven't made the icing yet, but it will be 250g icing sugar mixed with a little water and milk (for the colour), then use piping to add letters and other silliness. pictures to follow soon.

Sunday 18 October 2015

Wedding Post Box

Wedding post boxes can be as simple or as extravagant as you make them. Given the time left, I went for the simplest solution I could find.

That we have recently moved house means that boxes are in plentiful supply, so I simple picked one of the small ones and masking-taped the sides and top shut. The masking tape would ensure that the box stayed closed whilst at the same time providing a good surface to paint on. If I'd had more time, I would have taped the whole box as that would have given it a wooden-looking texture under the paint.

As it is, I cut a larger-than standard letter hole and applied 2 coats of the blackboard paint left over from the frames I have done a while back.

A liquid chalk pen - also used on the frames - ensured a nice finish to the writing, which we kept simple at the front and silly on the sides (one side has a flying love letter painted on it and the other features a rather childish love heart with our initials in it).

A few gems left over from the invitations and a few ornamental stickers left from the guest book completed the box within less than an half and hour, excluding drying time.

Menus and place cards

They were rather easy things to make, I admit. Using Microsoft Publisher, I used fairly generic design templates and added the writing in Verdana. Same-size boxes ensured that the cards could be folded neatly. I have a trimmer at home for work, so used that to get an even finish. The place cards and A5 menus were printed off onto white card, of which we got a pack of 50 from Hobbycraft,

This is an international wedding, so we needed both an English and a German version for the menus.


Saturday 17 October 2015

Dress update

Sooo, it's been another week and I haven't had time to do anything remotely do do with the wedding. Work was crazy and I am very panicky about getting it all done in time now. Today's shown a lot of progress, what with finished menus, a seating order, a table plan and place cards, as well as a started letter box.

But the dress is another matter.
It's shoulder straps are done - I've used ribbon to keep it simple - but with the whole bottom still needing draping, it's looking like another all-nighter. Having said that, I am pleased with it. The top fits perfectly, the bottom sits nicely around my curves and I actually look a lot slimmer than I am.

The shoulders that I've been so worried about now look okay and I may even leave the beads off them after all. So really, it's just the skirt. I will attempt to fix the messed-up thread tension on my sewing machine and give it another go.

But have the picture as an impression of what I've been doing.

And finally, a big THANK YOU. 1000 views cracked!

Saturday 10 October 2015

Finally connected!

Aargh! After a month and a half without any internet access, I am finally back online. So much has happened in the meantime, it is unbelievable. I will endeavor to post updates on the dress, the table decorations and anything else we have made as soon as I can now to bring everyone up to speed again.

Thursday 3 September 2015

Hen Night

Sooo. A DIY hen night. There will be 2 crafts involved in that evening: staying awake long enough for the children to go to bed and being able to mix cocktails. That's right, while the men go out to party us women will stay at home and have a girly night in.

The idea is as simple as it is practical - we will get all the cheesy movies out that we'd never normally get to watch, put on some gruesome face masks, paint nails and drink home-made cocktails.

I've spent the last 3 days putting together a list of both alcoholic and non-alcoholic cocktails, making a shopping list, using a major supermarket chain to work out the estimated price and I am now slowly going around different shops to put together all the items at a reasonable cost. Any leftovers from the budget (at the moment around £250) can be used towards face mask ingredients and morning-after breakfast.

I'd recommend to everyone to learn the basics of EXCEL. Not only is it a brilliant program to organise lists, but it has also helped me keep track of our wedding budget and now the hen budget. You really don't need to be a genius to work it, after all, I've managed. The two price columns add up the cost of all the items (estimated and actual) for me and the box to the right of the table helps me keep track of how much money I have saved from the estimate. The box stays green so long as money is saved and goes red if I go over budget. Simple, really, and I've done something similar for the wedding, with the sheet counting up all our savings and deducting every bill from it.

As you may guess from the list, our cocktails include, among others, Pina Colada, Mojito, White Russian, Cuba Libre, Long Island Iced Tea as well as non-alcoholic Fireside Flamer, Cranberry Cutie and Chocolate Cocktail. My cocktail-mixing days have been a while, but I am sure you can't unlearn these things.

Wednesday 2 September 2015

Tears, Tantrums and T'dress (sorry)

Just updated the post to show what the dress really looks like. The previous picture was awful, sorry.

Every day is dressmaking day, even though it still doesn't seem like much has got done. Draping the first bit was easy enough - all I had to do was find a shape that suited the dress and that I halfway liked.

Draping the second side was harder as I wanted to make sure that the patterns matched up completely.

Both parts were trimmed at the bottom, leaving a rather large margin to avoid fraying ruining the dress before the big day.

This then left the question of what to do next. The idea was to make the rest of the corset quite fitted, with a single layer of fabric being shaped around the belly and back bit. Oh, how mistaken I was. The fact that the material is gathered underneath the breasts has meant that it does look a little untidy under there, which means that any straightforward fabric layer would have shown the extent of the problem and in the trial I was close to tears and just buying a damn dress again.

However, I then chose to layer the fabric across the first 4 sets of bones on the corset (the affected part) and used a slip stitch to fasten the upper layer to the breast draping.
I have to say, I am quite happy with the result. The additional layers have taken the focus off the middle and onto the belly. Whether I would really like to show my belly off is an entirely different question, of course.
Any fabric underneath the last layer will now become skirt as this is the height my hips start at and dresses that shape appear to suit me.

So now it's onto the sides and back. Hopefully this means that by the end of the week the majority of the dress will be finished.

A friend has helped me choose some jewellery to take apart and use to cover up the shoulders and midriff area to hide any less than professional stitching. I am also using some of the newly-gained beads in a second tiara and potentially some earrings, so that everything will appear to match up after all.

Friday 28 August 2015

Hobbycraft Flower 3D Punch - Table Decorations

I am a big Hobbycraft fan and not getting paid for using their name on here often. I use a lot of their stuff, because it is usually decent quality at okay prices. Yes, there are cheaper places out there, but the convenience of simply getting on my bike and being surrounded by craft products within 10min is also a big factor in my decision to use the chain a lot.

As with everything, though, you have to be careful what you buy. I would not, for example, buy a set of 'craft' egg carton when I get a new one for free with my eggs every week. Or a set of 8 paper plates for £1 when I am sure that elsewhere I can get 30 for £1.50.


When I came across the flower craft punch for £6 I thought it would be the ideal, easy table decoration. I bought the craft punch and some red card and set about making flowers whenever the feeling that I should really work on that wedding got a bit too intense, but I was too tired to think greatly about what I was doing.

Now, the flowers are adorable. They are the right size not to look tacky, they are even and the slight 3D effect really gives them a quality edge. They will look great with our white table cloths and burgundy chair covers in a castle-style reception room. And the best part is that it almost feels like I made them for free! (Yes, I bought card and the craft punch, but can you imagine how much sufficient amounts of confetti bags would cost you for 10 tables?)

However, I found the craft punch itself to be a bit of a disappointment for what is, in essence, a lot of money. It seems sturdy at first, but being made almost entirely of plastic, it was not durable. It broke before I had gone through 6 out of 10 sheets of card. It automatically cuts out holes within the flowers and there is no way of knowing where those extra bits of card end up until you realise that you are expected to empty the top regularly, which I did figure out quite quickly. Failing that, the craft punch would get jammed after about 15 punches. Apart from the top, you cannot open the punch up to get rid of the jam, which meant laborious use of scissors to remove any stuck card from the tiny gap where the card is inserted.

The metal bar around which the top pivoted attempted escape after every punch, meaning that it had to be put back into place in regular intervals. But as it was surrounded by plastic, the force needed to cut the flowers proved too much for the craft punch, and after barely 5 sheets it was clear that the punch would not last. I filled in the breaking bits of plastic with my glue gun in an effort to make the punch last longer, but even so it broke during the punching of the 6th sheet.

I have since looked on the website and should have done my research better. Whilst the reviews for this particular craft punch are good - mainly because of the quality of the flowers - almost all the other, similar punches have had bad reviews saying that they, too, would break easily. In one of the reviews a fellow craftie stated that they had been told that the design of the punches had changed recently, and it is clear from the reviews that the change hadn't been for the better.

We will manage with fewer flowers as I am reluctant to buy another craft punch from there (my daughter's has now also broken) and unfortunately the receipt has gone walkies, so I can't return either of them. Lesson learned: do your research before you buy expensive items. The flowers are still lovely, though.

Sunday 23 August 2015

What has happened so far...

This week has been a busy one. We have sorted the rings (palladium bands, his wide with 2 diamante cuts and mine smaller with 2 cuts and a matte middle), the cake (though apparently 2 months is very short notice), my shoes (these beauties from Irregular Choice), my veil, his fittings and the rest of the pin-on roses for family members. I am now back on the dress sewing and have attached all the pinned-down bits, as well as cut the extra fabric off to prevent extra layers making me look bigger than necessary. I am currently sewing the modesty plate as a little bit of 'light' work before cutting more fabric tonight after my significant other has gone to bed and potentially even pinning it into place. We'll be meeting a few people over the next couple of days, and with guests staying over yet again I'll have to tidy what has generally become known as THINGS away until the final week before work resumes.

For those of you still looking for a few bits of inspiration, I have taken on my future mother-in-law's advice to use stiffening fabric inside the modesty plate to give it a little bit of shape. The plate itself is cut in a trapezium shape, 12cm at the top and 9cm at the bottom and encased in the same satin my dress is made from. Two satin ribbons either side of the outwardly-sewn end are attached to some Velcro hooks, which will find their opposite inside the dress. The hooks are on the modesty plate part, so that it won't scratch my back if slightly undone during the day.

P.S. - Almost 1000 views - Thank you everyone!

Thursday 13 August 2015

Family Flowers

I have been lectured on the importance of family members wearing flowers bearing a resemblance to the bridal bouquet, so I decided that I should get on with it whilst I still have some practice with the flower making.


The first two are smaller versions of the original as they are for children, but the principle for each flower will be similar: satin rose on a short stalk, metal beads around a white mini rose and 3 wired diamantes, with brooch bars attached to the back in case they don't have button holes to stick the flowers through.

Alterations for the women will be white roses instead of satin, diamantes in the rose and a silver mini rose instead of the white one.


Wednesday 12 August 2015

The Finished Bouquet


We have a new house, yay!!! In the wake of the great news, I have finished the bridal bouquet.


Together, this has been made from 13 white satin roses, 5 red satin roses, 5 self-adhesive gem stones I had lying around and a few leftover tiny silver roses from the invitations.

I have wrapped some more red satin around the stems as the floral tape is rather sticky and the last thing I'll need on the big day are sticky hands!


Sunday 9 August 2015

How to Make: Satin Roses

Originally, this task was meant to be outsourced to my future mother-in-law, but as her confidence faded with a picture I have shown her of what I want, I have taken on the task myself.

They can be a little fiddly at first, but once you have managed to do one it gets easier all the time.


All I used per rose was a thin piece of floral wire, floral tape, a pipe cleaner, needle and thread, a glue gun and broad satin ribbon.


First, fold the edge of the ribbon over to create a triangular shape.Next, fold the other edge down to create another triangle and fasten the edge with needle and thread.


Twist the ribbon and wrap around the triangle, then fasten at the bottom. Repeat until you have a rose shape. Cut the ribbon off at the desired length and sew the edge to the closest 'petal'.


Twist the top of the wire to make a loop at 90 degrees away from the rest of the wire. Hold a pipe cleaner against the wire; if necessary, twist it around the wire a few times to hold it in place. Wrap floral tape around both to cover the entire length and the loop.

Apply glue to the top of the wrapped loop with a glue gun and attach the rose head.

Repeat for as many flowers as you desire.
They look beautiful and are guaranteed not to wilt on your big day.

Fabric Draping - The dress is back!

We have spent the last few days house hunting and have finally found something promising, which we will try to secure on Monday. This has meant that - predictably - a lot of attention and focus had to be diverted from the wedding preparations, save for little items like the frames and the flower-shaped confetti, which will be strewn across the tables.

However, today is Sunday and that means that Estate agents are shut, so there would have been nothing to do but wait around. I decided it was time to stop being down (it's what losing your home does to you) and get back on the horse, so to speak.


With the corset inner done, the daunting task of actually draping the outside of the fabric awaited. It turned out to be easier than I thought it would be. I cut my satin to a rectangular shape since I had no idea what I needed, but needed to start somewhere. I then applied Fraystopper to the edges, since whilst sharpening my scissors on sandpaper brought some cutting relief, the material still frayed like mad.

Using up all my available pins, I shaped the fabric around the inner, starting with the top of the bra straps and finishing under the bust. Each time, I folded a small portion of the fabric to cover part of the previous section, in the hope that this could cover up any sewing faults, which it did. I then sewed the edges of the folded material together - in a line at first, which turned out to be a bit of a mistake, then just at points where the material met or needed support in staying in shape, which showed some promise. I am not too worried about the messy top and whatever the material will look like under my bust, as I am making shoulder and belt appliques which will cover all that up.

So things are looking up on all fronts and I hope that this trend is set to continue.

Thursday 6 August 2015

Wedding Table Decor - Table Numbers

Amid all the sadness over being forced to move house and the seemingly impossible search for a new home somewhere close to my child's new school, the wedding preparations cannot be neglected. I have to say, I was in little mood to do anything yesterday, so I decided it was time to finish the table number frames - an easy, quick project with decent results.


I bought the frames just before our holiday. ASDA had a sale on the frames - each cost half its original price. We managed to get 9 heart-shaped frames and one rectangular one, which we wanted to reserve for our table. The paint was a small pot of Wilko's own brand and more than sufficient for our needs - I could even have gone with the smaller one.

The concept is simple enough: unwrap, paint the inside and re-insert after the frame inner has dried. Acquire chalk and draw as required. The wire cutter was my unwrapping aid as I could not find any of my many pairs of scissors.

Wednesday 5 August 2015

So it doesn't just rain...

We've just come back from a little holiday to discover that we will have to move house within the next 2 months as our landlord wants to move into our property. Within the next 2 months. We will be getting married in about 2 months and a half.

So now add to the stresses of organising a wedding - minutely planned and work scheduled so far - to the stresses of packing everything up, finding a property, cleaning the place out, moving into a new property and unpacking, ready for October. Not to mention the cost of the whole thing, which will be added on to the already sky-high cost of the wedding. Or the upset that this has caused us, and - more importantly - my child, at losing our home, which we have only settled into a year ago.

Oh my dear lord.

Monday 20 July 2015

Top Tips for Corset Making

What have I learned so far?

1. Duct Tape makes for fitted corsets.
Money-saving and perfectly fitted to your body, wrapping yourself up in duct tape can be the perfect start when you, like me, can't read patterns and need to decide where bones would have to go to tuck all the right bits away. Let's face it, any pattern you buy will never suit you 100%.

2. Cable ties make cheap, strong, flexible boning.
Just that, really. You can easily cut them to size with normal kitchen scissors, file them down and you have all you need to start your own corset.

3. Unless you know your stuff, make a 'skeleton corset'.
I used lining fabric to fit all the corset panels together and attach the bones. It is stiff enough to make a small difference to your shape already, but flexible enough to be able to wrap the bones into the fabric and attach them securely.

4. Buy pins. LOTS of pins.
I don't know how I would have got this far without two pin wheels. Pins have helped me trace where I needed to sew, hold everything in place, adjust panels and fabric and shape my cups.

5. The Look of the Inner doesn't matter.
I am telling myself this one. It's okay if the inner isn't perfect, because, let's face it, no one will ever see it. You cover both ends up with fabric, which will smooth out any little lumps and wonky sewing, as long as you can hide the stitches. The purpose if the inner is to hold everything in place, not to look good. So, if you are making your first ever corset and you are a relative beginner, don't panic.

6. Wear protection.
On your fingers, that is. Despite owning and using a thimble, I wish I had more, as my fingers are well and truly stinging from all the little needle pricks.

Saturday 18 July 2015

Shaping the darned thing

As promised, here is a picture of what the corset currently looks like. The rather crude sewing of the panels for the cup is mainly down to the fact that I had the corset on as I was sewing them together, so as to keep the cup pretty exact and fitted. It also meant that it was much more important to keep the needle away from my flesh than to have it look pretty at that moment in time. I keep reminding myself that it will all be covered up with layers of satin, so it'll be fine. Plus, now that the cup is done and fairly stiff, I can use that to shape another layer of fabric around the outside to soften the bumps and visually increase my boob size further. It'll still have to be smoothed out around the edges, but other than that I am very pleased with today's work :-)

Sew loooong

I will share photos etc. before the weekend is out, as progress is not really evident, but I have bought some stiffening fabric to be sewn into the corset with the (now fully) attached bra. As I am typing, one side has panels 1-2 sewn on and the other has panels 1-2 tacked on. I will likely leave 3-4 out and attach more stiffening fabric at 5 on both sides to aid the back, but allow my hips to create a decent hourglass shape.

I used the same panels that I made from duct tape for the corset shape, so it is indeed a good idea to keep them until you are fully done.

Next I have to figure out how to do a bra shape and attach stiffening fabric to the back of the bra, in order to create a more rounded, slightly padded version. I may use toy stuffing to add more shape to my ample bosom :-)

The back of the corset currently looks really untidy, but I hope that once the stiffening is done and I am happy with the overall shape I can sew the backing fabric on and hide all the not-so-nice bits.

I am in two minds about when to do the front - is that done before or after the back? After all, the aim is to have quite a showy front and no one but myself and possibly my husband-to-be are ever going to see the inside. On the other hand, the messy inside is really bugging me, whereas the front looks quite nice even now.

I have picked up speed now, though, as the stiffening fabric uses crochet thread (yes, I am mixing and possibly abusing different types of yarn, but who cares if the result is the same), which takes up much more space and therefore is quicker to use. I am still using back stitch only, as it said in the Dressmaking book that it is a very strong stitch, and for a corset I figured that strong is good.

Saturday 11 July 2015

Failure no. 2 - and the solution

I spent hours sewing this top together. Hours measuring, tacking, adjusting and re-adjusting. And despite all that, when I tried it on yesterday, it just wouldn't fit! Turns out that in all my measurements, I have failed to notice that - whilst the overall circumference is the same - my breasts are just much larger than those of the dummy. So when I attempted to fit the top to my chest, my boobs were sticking out on the sides.

For a moment, I was tempted to throw a temper tantrum suitable for a two-year-old, throwing things and stomping my feet included.

But then - and I am not sure how I managed to actually outwardly keep my calm - I decided it was time for a little cheating. So I went upstairs and raided my wardrobe. And I found exactly what I needed - an old, redundant white sports bra. Originally a cup B, while my actual size is a cup C, it can still be stretched to fit around and, most importantly, cover all those bits that I had wanted to cover for ages.

I pinned it to the corset and it appears to work and fit! Granted, my cleavage will need to be covered just that little bit more, but since the original idea was to use the inner as a skeleton to fit all the other fabric around, I would say we have a winner.

It is not so much the support I need it for, since the underbust corset does a surprisingly good job with that and I am still one of those lucky girls where nothing is hanging down to the floor yet. It is more the appropriate coverage and saving time now that I am almost having to start over again.

The bra also means that I now have a decent, adjusted skeleton for the straps, which I just couldn't quite figure out last time.

So, ladies, if you want to make your own and you have been following this blog before, find a bra to integrate. It saves time, tears and tantrums.

Sunday 28 June 2015

Can we make it? Yes we can!

Sorry for the cheesy Bob the Builder reference, but I am having one of these days.

The in-laws have been over this weekend, and in their well-meaning way, have warned me, once again, against making so many things for the wedding myself.
The list is growing; I have a lot of projects on the go, because some I can do in front of my future husband and some I can't, some can be done during a break at work, some need drying time and for some I need the materials. Plus, I get bored and prefer to start other things in the meantime.


Currently on the go:
  • the dress - won't be finished until the end of summer, I presume (still working on the top)
  • the children's activity books (the Christening last weekend has shown me just how important they are)
  • the favours, though I am waiting for us to eat many more pizzas to save some of those plastic bits holding the boxes, and I have had to wait a long time for the sand to dry
  • the tiara for my daughter and my bouquet - not really in progress; I am just gathering materials
  • the table decorations - again, drying time and lack of material are the main issues here, plus storage space.
Should I start one project and only start another when I have finished the first? Probably. But then, things probably wouldn't get done at all, or I would forget about all the little things,which personalise our wedding.

Sunday 21 June 2015

The Activity book cont.

We went to a friend's Christening today, which took up most of the day, so there was little time or opportunity to continue with the wedding preparations. However, being the opportunist I am, I used the time in the car to continue drawing pictures for the Activity booklet for the children.


We now have:
  • 2 mazes
  • 1 anagram
  • 1 dot-to-dot picture
  • 1 word search
  • 1 find the correct path picture
  • 4 design your own (dress, bunting, hairdo, flowers)
I am aiming for 20-30 activities: some simple (tic tac toe etc.), some, like the crossword puzzles, with more prep and input needed.

Taking photocopying out of the equation, the booklets will be almost free. Designs are done by me and free education resource Puzzlemaker, the paper and ribbon won't add for the 5-10 children who will attend.

Saturday 20 June 2015

What about the children?

Our decision was made fairly early on that we would allow children to our wedding. My daughter and future nephews would be there anyway and a few of our friends have recently had children, so it was a no-brainer to accommodate children into the wedding somehow.

Thing is, for children, weddings can be boring. There are the speeches, there is the sitting still, there is the waiting for food. Yes, there is a disco and everyone will start dancing (the adults, once suitably intoxicated), but most of the time it will be a case of sitting around.

To avoid total meltdown, I thought I would put together a wedding-themed activity booklet for them. This will have a variety of crosswords, puzzles (both to be done with the help of Puzzlemaker) and drawings in them.


The ones in the photo are some of the drawing ideas - Design your perfect wedding dress, Design the bride's hair and make-up and Design the wedding flowers.

Adding a few crayons (perhaps the children's favours?), rubbers, sharpeners etc. to the table should hopefully keep them fully entertained during those long hours that may not be that interesting otherwise.

Sunday 14 June 2015

It's all coming together

The mannequin was indeed a good investment. I was able to pin everything together today, able to see where adjustments need to be made and where fabric needs to be added to tidy up the sides and back. I was also able to pin the neckline to the exact shape it needs to be in the end and tack the pieces loosely together.

Currently, I am adding the elastic band to the waistline in my corset, before I start to sew all the front bits together.

Seeing the dress coming together has given me a real motivation boost, which was very much needed after I have spent what seems like ages just working on individual bits, without ever seeing what it was all going to become. It is all starting to make sense in my head. Good times :-)

Saturday 13 June 2015

Dressmaking Mannequin


So my corset part is finished. I tidied up the top and am now pondering my next move. Should I continue with the corset as a separate part or should I add sleeves and general upper-tops bits?

I tried the latter today. I pinned fabric to my top, adjusted, sewed around it and attempted to add straps.

However, having arms flailing around my side, back and front simultaneously, whilst at the same time attempting to hold the corset in place, proved frustratingly difficult. And so I decided that it was to invest in a dressmaker's dummy.

Now, a professional one would cost about £450, for which I may as well get a dress. So, instead, I got a mannequin, which could double up as a decoration (apparently), for £39.99 from The Range.

I am a size 8, but my shape is not conventional, so I used toy stuffing and a bag to adjust the dummy to my own shape, for precision. My job tomorrow will be to add shape to the top.

I know that it looks like nothing much, but there is actually a steep learning curve going on here. Isn't that partly what this is meant to be about? That, and a gorgeously beautiful dress?


Saturday 6 June 2015

Corset making update

I am about 1/3 through with it now. The week has, again, been going slowly, owing mainly to the fact that I have been working pretty much straight from 5.30am to 10pm every day, what with family and my job to sort out. I have to admit that I didn't do any wedding preparation during the week, as by 10pm I was usually falling asleep on the sofa about 10min after I'd finished working.

Next week is barely looking better work-wise (intensive phase, hopefully followed by quite a calm one in 2 weeks' time and holidays a few weeks after that), but I should be getting a lot more done after it's passed. There are still 4 cards here, which is a little annoying, but they are slowly moving into the last few hands, or so I am told.

My corset is going well; I have indeed overestimated my body a little, so I have plenty of room for playing with the material at the back edge, and even on the side, should I consider a zip there for ease on the actual wedding day - otherwise, who will lace me up?
The cable ties are strong, but flexible enough to allow plenty of movement, and the bones spaced out in a way to tuck most of my belly away.


The middle layer still needs its boning, but the rest is done, save from the top and bottom, for which I am still considering support with thinner cable ties. It looks quite messy on the picture, but it gives my curves a nice fit. My boobs are also nicely enhanced :-)

So the next thing will be to look at the fastenings, which would also be attached to the inner layer, as well as the elastic, which goes all the way across. I would rather like to get the fastenings too short rather than too long - too short would mean that I could work with a modesty plate to cover up any gaps at the back, whereas too long would just ruin the point of the whole corset.

Thursday 28 May 2015

Guest Book

As one of our many, little accessories, we will ask the guests to write a little something into a guest book, as a wedding keepsake. Of course, the hope is that as the night goes on and the guests will become ever more intoxicated, that the entries will be somewhat more interesting by the end of the night.

Guest books cost £15 pre-made. They are essentially blank pages in a note book saying 'Our wedding Guest Book' or similar at the front.

I found that a little insulting (the price, that is) and bought a note book for £2.50, blank pages and all. The ribbon was already attached, so all that was needed was some marker to write at the front and a few gemstone stickers to make the flowers. 30min work, if that, and £12.50 saved in the name of beating that wedding price tag.


Monday 25 May 2015

Corset Making

So I finally braved the biggest task yet: making my first, own, fitted corset.

After much searching around on YouTube and Google, I have come up with a workable plan of how to do it - and, what's more, I have actually started and am finding it easier than I thought it would be.

The first step consisted of making the pattern for the corset. I will spare you pictures of the procedure, but I found this lovely video on YouTube, which recommended using Duck Tape to draft patterns. As ridiculous as the idea sounds at first, it turned out to be a real time-saver.


My partner certainly had fun carrying this out. I donned a beautiful plastic bag, with holes cut out for my head and arms, to protect my body from the inevitable bruising should the tape stick to me. He then proceeded to wrap me up in tape. It went horizontally all the way around my belly, squashing it in as much as was comfortable while still allowing for breaths to be drawn, and vertically around my breasts, to allow them to be supported whilst not being squashed at all.

After he had finished, I used small isolation tape in silver to mark out two potential corset shapes: one underbust one and one which covered my breasts. As both sides of the corset are identical once worn, half a shape on each side was sufficient. I marked the front middle and asked my partner to mark the back middle. Then I used another bit of tape to mark the part where my hips started, vertically across from the side to the front: this is where essential boning would be put.


The most dangerous part was cutting the whole thing off my body: down the front and back middle, using the strongest kitchen scissors we had.

The rest then was up to me. I decided to go with the underbust corset (less hassle with attempting to integrate a bra) and divided the corset half into 5 sections, roughly with a permanent marker, whilst held against my body; then I cut it all apart.

The transfer onto the inner lining was easy. I used a textile chalk pencil to draw around the shapes, leaving about 1in seam allowance on each side, and about 2in at the bottom - the latter as I realised that the corset would be attached to the skirt later on. Each piece was labelled 1-5L, as I was sure that I would forget the order of the pieces later on (and I was right!).

I used my new Hobbycraft mini sewing machine to attach the first two seams together. Then I merged what I had learned about boning so far and pressed the extra fabric on either side down.


The boning was cheap; I used broad cable ties I bought from Wilkinson's at about £2 a pack, cut them to the size I needed and filed them down with a metal file to soften the ends.

By now the lining was starting to fray, so I applied Fraystopper to the edges of each seam and pinned them down around the edges of the boning. I decided to hand-sew each bone into its correct position as I wasn't quite sure that my sewing machine would be strong enough to deal with the boning if pierced.


So this is what I am at now. The last two pieces still need to be attached and then the patterns copied face-down onto another lining sheet. Then I need to make a decision on how the hooks and ribbons will be attached, as well as the horizontal stretchy band every corset appears to have.

Two further layers will then be attached - another layer of lining to neaten up the inside of the dress and the outer decorative layer.

For once, I am actually quite confident that I can do this.

Friday 22 May 2015

Update

Just a quickie to let people know I am still fully in preparation mode. Things had to quieten down for a while, what with the new job and other things going on, but we are still, slowly, moving into the wedding direction.

There are still unfinished invitations cluttering our living room, although I have been assured that these will be the last ones - and good job, too, as I am running out of supplies and unwilling to buy any more (we have reached almost 70 cards now). Apparently, they are going to be written this weekend. Good.

In addition to that there have been lots of little developments - I have thrown my first dress attempt out and am currently working on no.2, which is not only simpler in style, but with which I have also wisely moved away from dress patterns I can't read or make to the simple old-style version of pinning the fabric directly to my body and marking down where fabric needs to be tucked in. This has led to quite a nice fit around the bust area, although I am still a little unsure as to how I will get the back to fit, because whilst I am bendy, I am not a contortionist.

The table decorations are moving along nicely, too - I have also thrown my first attempt out and am working on no.2 there, which I will detail later. Misshapen first attempts and much improvement on no.2s may become my default pattern for the preparations, though, hopefully, not the marriage itself.

I have also found my personal favourite wedding favours to give away - my lab have thrown out sets of tiny vials, which I will fill with coloured sand and label with messages like 'fairy dust' and 'love potion'. Mr husband-to-be is not too taken by the idea yet and wants sweets instead, but come on, sweets are boring and will be gone soon after.

What is still on the list? The little one wants a tiara, though I may just lend her my white beaded hairband. I have bought a guest book, which, pre-made, would have cost £15, for £2.50, to decorate later.

Oh, he is back.

Sunday 19 April 2015

Hobbycraft Mini Sewing Machine Review

I hold my hands up and admit, I was close to quitting yesterday. I honestly thought I'm never going to do it.

My partner used the time I spent at a children's birthday party (not getting bored for a change - we adults were allowed to participate in the ice skating activity!) to sort out the suits, and when we got home, I proudly looked at the sewing I had done over the holidays. And my face fell. It looked sloppy, lopsided and a mess. Of course I knew I had overlooked a few things. The fabric should have been washed first as it is prone to shrinkage. The gathered part should have been done with two threads at the same time, not the shoddy attempt I made to rescue the one-threaded bit afterwards. Silly, beginner's errors, which have now cost me some material. My local Hobbycraft have run out of the satin I used, so the whole pressure bubble burst in me frantically trying to find a dress I liked online. My partner then told me how silly I was (granted - he didn't see the first attempt) and I agreed to give sewing machines another try.

My mother-in-law's is lovely, but just not for beginners at all. It has lots of different settings, an option of one or two needles and the tension needs adjusting for each type of thread. When I first used it, I was just overwhelmed and had little idea what I was doing. It is a miracle I managed to thread the bobbins alright.

So off I went to purchase the one thing I had set my eyes on for the last few weeks: Hobbycraft's very own mini sewing machine. At £25, not only was the price attractive; the whole things also came pre-threaded, saving me the many minutes of cultural vocabulary enhancement (i.e. swearing) I spent fussing with the other machine.

Working the machine is intuitive, if you have ever seen a sewing machine before. There are two wheels and two buttons, One wheel you leave alone (it sorts out the thread tension and is already pre-set to its optimum setting), the other you use to sort out the needle height. One button switches the sewing machine on, the other one sets the speed to low or high. The one lever at the back ensures that the fabric can be inserted and held in place. That is it. As a sewing machine for beginners, this is brilliant. It does what it says on the packing - sew fabric together.

There are two downers. One is that the machine only works the most basic running stitch; there are no potions to change to any other type. Having said that, the machine costs £25 as opposed to £100 for most of the others, so I didn't expect miracles. The other downer is that the instructions still require some basic knowledge of how a sewing machine works. Other than the labelling, there were no diagrams to show how to thread the machine; the instructions only stated to look at the set-up closely before threading and the rest was text. Now, having threaded the other machine, I have a basic understanding, but I feel that diagrams would have helped there as this machine would most obviously be bought by beginners like me, or by people who just use it 'on the go'.

Other than that, however, the tiny machine is just what I wanted. Something to help me get started and save me many hours of labour. Thank you, Hobbycraft, I love my new favourite toy!

I will cut the patterns again and carry on!


P.S. Just in case you were wondering, I now have a full-time job, so typing posts will probably only happen once or twice a week.

Tuesday 7 April 2015

Dress the First

Phew. I've finally done it. I've started on the big dress. No toile; time is precious enough as it is.


The dress I've chosen as my basis for the top is the one shown above. There are so many advantages to it, including being able to lace it up two ways (three when I have had my way with my dress), so that any misjudgements in size could be forgiven, provided that I see myself as too fat rather than too thin. So good chance it'll go well :-)

There are a fair few things that will have to be altered. There are the sleeves. I love the dress, always have done, but always had to cover up the sleeves as they just didn't fit. There is elastic band at both ends; I will remove the one on the inside and make the sleeves larger to cover my shoulders completely.

The top will be shorter. It will finish at the hip and then the dress will flare out from there. If there is one thing the trial dress from the previous post had shown me it is that a frontal shot of a longer-than-waist top will make me look huge.

The skirt may include some layering. I haven't decided that yet. I have an underskirt if I decide against that, but if not, the layering will add volume.


After a curious measuring session, I have drawn the first two patterns onto squared paper. That, in itself, didn't prove too challenging, although exactly what the shape of the ruffled bit is, is a bit of a mystery. Again, I rather err on the side of caution and go too big rather than too little.


I then pinned the patterns to the silk and started to cut. Satin is bloody hard to cut! Or my scissors need some sanding. There will be some fraying, but hopefully the large seam allowance of 1.5cm will more than make up for that, given that it will only be worn once.

 Am I a fool? Maybe. But it will be fun while it lasts.

Sunday 15 March 2015

Dress Preparation

So I am going to brave it. I have given up on the idea of losing x amount of pounds for the wedding - I weigh 56kg and that's that - and will use whatever fat I carry on me now to guide me through the shape of the dress.

A colleague of mine has been so kind as to lend me some of her wedding things. I asked her whether I could buy her old underskirt of her and she agreed, then showed up with veils and dresses in addition to that! One of the dresses was highly interesting and, amazingly, even suited me, so I will use it as a guide for my autumn dress.

I will jot down what I learned here, so I don't forget:


The corset: undoubtedly the most interesting thing to look at for me. It had two layers of fabric - one cotton, one satin. 8 pieces altogether. The bones felt like plastic - nothing a good cable tie wouldn't replace, but contrary to my previous thoughts, it didn't really seem to matter, as the dress was tight enough and would have held my stomach in anyway. I counted 12 bones, paired up. My partner wrapped me up in duct tape the other day, so I have a perfect imprint of my upper body, excluding, of course, seam allowance.


The skirt, again, was two layers of satin. It had an extra layer of white organza and a light, green fabric added to it, both gathered just underneath the corset on one side. I found it interesting just how easy the gathering seemed and will definitely use that when I put the finishing touches to me dress.


The pattern on the bottom hem was raised - I liked it on this dress, but as mine should be fairly plain, I doubt I will use it. I may, though, add a fairly large hem on the organza - somehow, it worked very well.

Now the bits that I'd change:
The corset was zip-up at the back, meaning that I was unable to close it properly - any weight gain between now and the big day would mean I could trash the dress. Not good. Lace-up it is.
And, once again, the pictures I took with the dress on confirmed that I am just not the type for boob tube. Cover up my arms already!