
Saturday, 10 October 2015
Finally connected!
Aargh! After a month and a half without any internet access, I am finally back online. So much has happened in the meantime, it is unbelievable. I will endeavor to post updates on the dress, the table decorations and anything else we have made as soon as I can now to bring everyone up to speed again.

Thursday, 3 September 2015
Hen Night
Sooo. A DIY hen night. There will be 2 crafts involved in that evening: staying awake long enough for the children to go to bed and being able to mix cocktails. That's right, while the men go out to party us women will stay at home and have a girly night in.
The idea is as simple as it is practical - we will get all the cheesy movies out that we'd never normally get to watch, put on some gruesome face masks, paint nails and drink home-made cocktails.
 I've spent the last 3 days putting together a list of both alcoholic and non-alcoholic cocktails, making a shopping list, using a major supermarket chain to work out the estimated price and I am now slowly going around different shops to put together all the items at a reasonable cost. Any leftovers from the budget (at the moment around £250) can be used towards face mask ingredients and morning-after breakfast.
I'd recommend to everyone to learn the basics of EXCEL. Not only is it a brilliant program to organise lists, but it has also helped me keep track of our wedding budget and now the hen budget. You really don't need to be a genius to work it, after all, I've managed. The two price columns add up the cost of all the items (estimated and actual) for me and the box to the right of the table helps me keep track of how much money I have saved from the estimate. The box stays green so long as money is saved and goes red if I go over budget. Simple, really, and I've done something similar for the wedding, with the sheet counting up all our savings and deducting every bill from it.
As you may guess from the list, our cocktails include, among others, Pina Colada, Mojito, White Russian, Cuba Libre, Long Island Iced Tea as well as non-alcoholic Fireside Flamer, Cranberry Cutie and Chocolate Cocktail. My cocktail-mixing days have been a while, but I am sure you can't unlearn these things.
The idea is as simple as it is practical - we will get all the cheesy movies out that we'd never normally get to watch, put on some gruesome face masks, paint nails and drink home-made cocktails.

I'd recommend to everyone to learn the basics of EXCEL. Not only is it a brilliant program to organise lists, but it has also helped me keep track of our wedding budget and now the hen budget. You really don't need to be a genius to work it, after all, I've managed. The two price columns add up the cost of all the items (estimated and actual) for me and the box to the right of the table helps me keep track of how much money I have saved from the estimate. The box stays green so long as money is saved and goes red if I go over budget. Simple, really, and I've done something similar for the wedding, with the sheet counting up all our savings and deducting every bill from it.
As you may guess from the list, our cocktails include, among others, Pina Colada, Mojito, White Russian, Cuba Libre, Long Island Iced Tea as well as non-alcoholic Fireside Flamer, Cranberry Cutie and Chocolate Cocktail. My cocktail-mixing days have been a while, but I am sure you can't unlearn these things.
Wednesday, 2 September 2015
Tears, Tantrums and T'dress (sorry)

Every day is dressmaking day, even though it still doesn't seem like much has got done. Draping the first bit was easy enough - all I had to do was find a shape that suited the dress and that I halfway liked.
Draping the second side was harder as I wanted to make sure that the patterns matched up completely.
Both parts were trimmed at the bottom, leaving a rather large margin to avoid fraying ruining the dress before the big day.
However, I then chose to layer the fabric across the first 4 sets of bones on the corset (the affected part) and used a slip stitch to fasten the upper layer to the breast draping.
I have to say, I am quite happy with the result. The additional layers have taken the focus off the middle and onto the belly. Whether I would really like to show my belly off is an entirely different question, of course.
Any fabric underneath the last layer will now become skirt as this is the height my hips start at and dresses that shape appear to suit me.
So now it's onto the sides and back. Hopefully this means that by the end of the week the majority of the dress will be finished.
A friend has helped me choose some jewellery to take apart and use to cover up the shoulders and midriff area to hide any less than professional stitching. I am also using some of the newly-gained beads in a second tiara and potentially some earrings, so that everything will appear to match up after all.

Friday, 28 August 2015
Hobbycraft Flower 3D Punch - Table Decorations
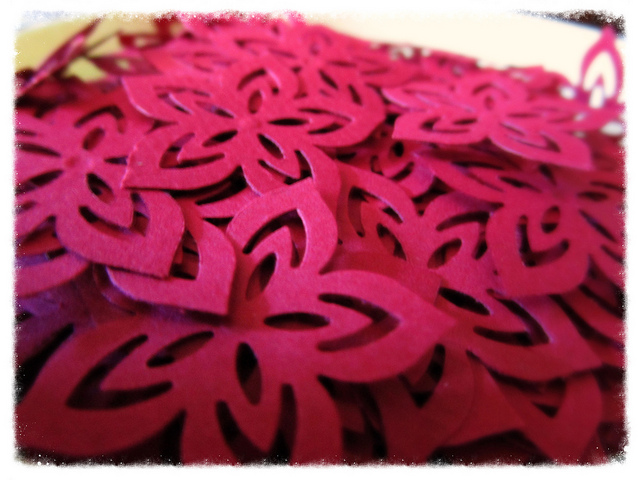
As with everything, though, you have to be careful what you buy. I would not, for example, buy a set of 'craft' egg carton when I get a new one for free with my eggs every week. Or a set of 8 paper plates for £1 when I am sure that elsewhere I can get 30 for £1.50.
When I came across the flower craft punch for £6 I thought it would be the ideal, easy table decoration. I bought the craft punch and some red card and set about making flowers whenever the feeling that I should really work on that wedding got a bit too intense, but I was too tired to think greatly about what I was doing.
Now, the flowers are adorable. They are the right size not to look tacky, they are even and the slight 3D effect really gives them a quality edge. They will look great with our white table cloths and burgundy chair covers in a castle-style reception room. And the best part is that it almost feels like I made them for free! (Yes, I bought card and the craft punch, but can you imagine how much sufficient amounts of confetti bags would cost you for 10 tables?)
However, I found the craft punch itself to be a bit of a disappointment for what is, in essence, a lot of money. It seems sturdy at first, but being made almost entirely of plastic, it was not durable. It broke before I had gone through 6 out of 10 sheets of card. It automatically cuts out holes within the flowers and there is no way of knowing where those extra bits of card end up until you realise that you are expected to empty the top regularly, which I did figure out quite quickly. Failing that, the craft punch would get jammed after about 15 punches. Apart from the top, you cannot open the punch up to get rid of the jam, which meant laborious use of scissors to remove any stuck card from the tiny gap where the card is inserted.
The metal bar around which the top pivoted attempted escape after every punch, meaning that it had to be put back into place in regular intervals. But as it was surrounded by plastic, the force needed to cut the flowers proved too much for the craft punch, and after barely 5 sheets it was clear that the punch would not last. I filled in the breaking bits of plastic with my glue gun in an effort to make the punch last longer, but even so it broke during the punching of the 6th sheet.
I have since looked on the website and should have done my research better. Whilst the reviews for this particular craft punch are good - mainly because of the quality of the flowers - almost all the other, similar punches have had bad reviews saying that they, too, would break easily. In one of the reviews a fellow craftie stated that they had been told that the design of the punches had changed recently, and it is clear from the reviews that the change hadn't been for the better.
We will manage with fewer flowers as I am reluctant to buy another craft punch from there (my daughter's has now also broken) and unfortunately the receipt has gone walkies, so I can't return either of them. Lesson learned: do your research before you buy expensive items. The flowers are still lovely, though.
Sunday, 23 August 2015
What has happened so far...

For those of you still looking for a few bits of inspiration, I have taken on my future mother-in-law's advice to use stiffening fabric inside the modesty plate to give it a little bit of shape. The plate itself is cut in a trapezium shape, 12cm at the top and 9cm at the bottom and encased in the same satin my dress is made from. Two satin ribbons either side of the outwardly-sewn end are attached to some Velcro hooks, which will find their opposite inside the dress. The hooks are on the modesty plate part, so that it won't scratch my back if slightly undone during the day.
P.S. - Almost 1000 views - Thank you everyone!
Thursday, 13 August 2015
Family Flowers
 I have been lectured on the importance of family members wearing flowers bearing a resemblance to the bridal bouquet, so I decided that I should get on with it whilst I still have some practice with the flower making.
The first two are smaller versions of the original as they are for children, but the principle for each flower will be similar: satin rose on a short stalk, metal beads around a white mini rose and 3 wired diamantes, with brooch bars attached to the back in case they don't have button holes to stick the flowers through.
Alterations for the women will be white roses instead of satin, diamantes in the rose and a silver mini rose instead of the white one.

Wednesday, 12 August 2015
The Finished Bouquet
We have a new house, yay!!! In the wake of the great news, I have finished the bridal bouquet.

Together, this has been made from 13 white satin roses, 5 red satin roses, 5 self-adhesive gem stones I had lying around and a few leftover tiny silver roses from the invitations.
I have wrapped some more red satin around the stems as the floral tape is rather sticky and the last thing I'll need on the big day are sticky hands!

Subscribe to:
Posts (Atom)